Blockchain is a decentralized ledger system that uses a computer network to securely record transactions. Think of it as a shared, tamper-proof database where information is stored in blocks linked together in a chain.
- Python vs Development Platforms: Which Approach Fits You?
- Key components of a blockchain
- 1. Blocks
- 2. Transactions
- 3. Cryptographic Hash Functions
- 4. Consensus Mechanism
- 5. Decentralized Network
- 6. Digital Signature
- 7. Smart Contracts
- How to Build Your Blockchain From Scratch Using Python
- Step 1: Install Python and Required Libraries
- Step 2: Define the Blockchain Class
- Step 3: Implement Proof of Work
- Step 4: Create a Flask Web Server for Interactions
- Step 5: Launch the Blockchain Web Server
- How to Build a Blockchain with Development Platforms
- Step 1: Selecting a suitable blockchain platform
- Step 2: Understanding Platform Features
- Step 3: Setting Up Development Environment
- Step 4: Designing Smart Contracts
- Step 5: Testing Smart Contracts
- Step 6: Deploying Smart Contracts
- Step 7: Interfacing with the Blockchain
- Step 8: Testing and Deployment
- Step 9: Monitoring and Maintenance
- Match Your Goal to the Right Path
- Security Considerations
- Deployment and Testing
- Step 1: Choose a Test Network
- Step 2: Configure Deployment Parameters
- Step 3: Deploy Smart Contracts
- Step 4: Test Transaction Functionality
- Step 5: Monitor Deployment Status
- Building a Blockchain Project in Malaysia & Singapore
- Conclusion
- Helpful official resources
- Frequently Asked Questions (FAQs)
Blockchain has moved well beyond a niche experiment. Global cryptocurrency ownership reached roughly 741 million people in 2025 (up about 12.4% year on year, according to Crypto.com’s Market Sizing report), and the same underlying technology now powers supply-chain tracking, tokenised real-world assets, digital identity and enterprise record-keeping.
When starting your blockchain project, choosing between a Python approach and development platforms can be overwhelming. I am making this decision-making process easier by comparing the Python approach to the convenience of development platforms. Let’s discuss the basics of blockchain first.
Blockchain is important because of its real-world applications in diverse industries, including finance, supply chain management, healthcare, voting systems, identity management, real estate, and gaming.
In this article, learn about the two main ways how to build a blockchain. Figure out how to build a strong and efficient decentralized system.
Python vs Development Platforms: Which Approach Fits You?
Before diving into code, here is the honest trade-off between the two routes this guide covers. Most beginners should skim both, build the Python demo to learn, then use a platform for anything real.
| Factor | Build from scratch (Python) | Use a development platform |
|---|---|---|
| Best for | Learning how a blockchain works inside | Shipping a real DApp, token or network |
| Time to first result | An afternoon for a working demo | Hours to days, depending on the platform |
| Main language | Python | Solidity (Ethereum), Rust (Solana), Go/Java (Hyperledger) |
| Networking & consensus | You build (or fake) it yourself | Handled by the network |
| Production-ready? | No — single node, no real security | Yes — battle-tested and audited |
| Typical cost | Free (runs on your laptop) | Gas/deployment fees; near-zero on testnets |
| What you walk away with | Deep understanding of blocks, hashing & proof of work | A deployable app real users can interact with |
Key components of a blockchain
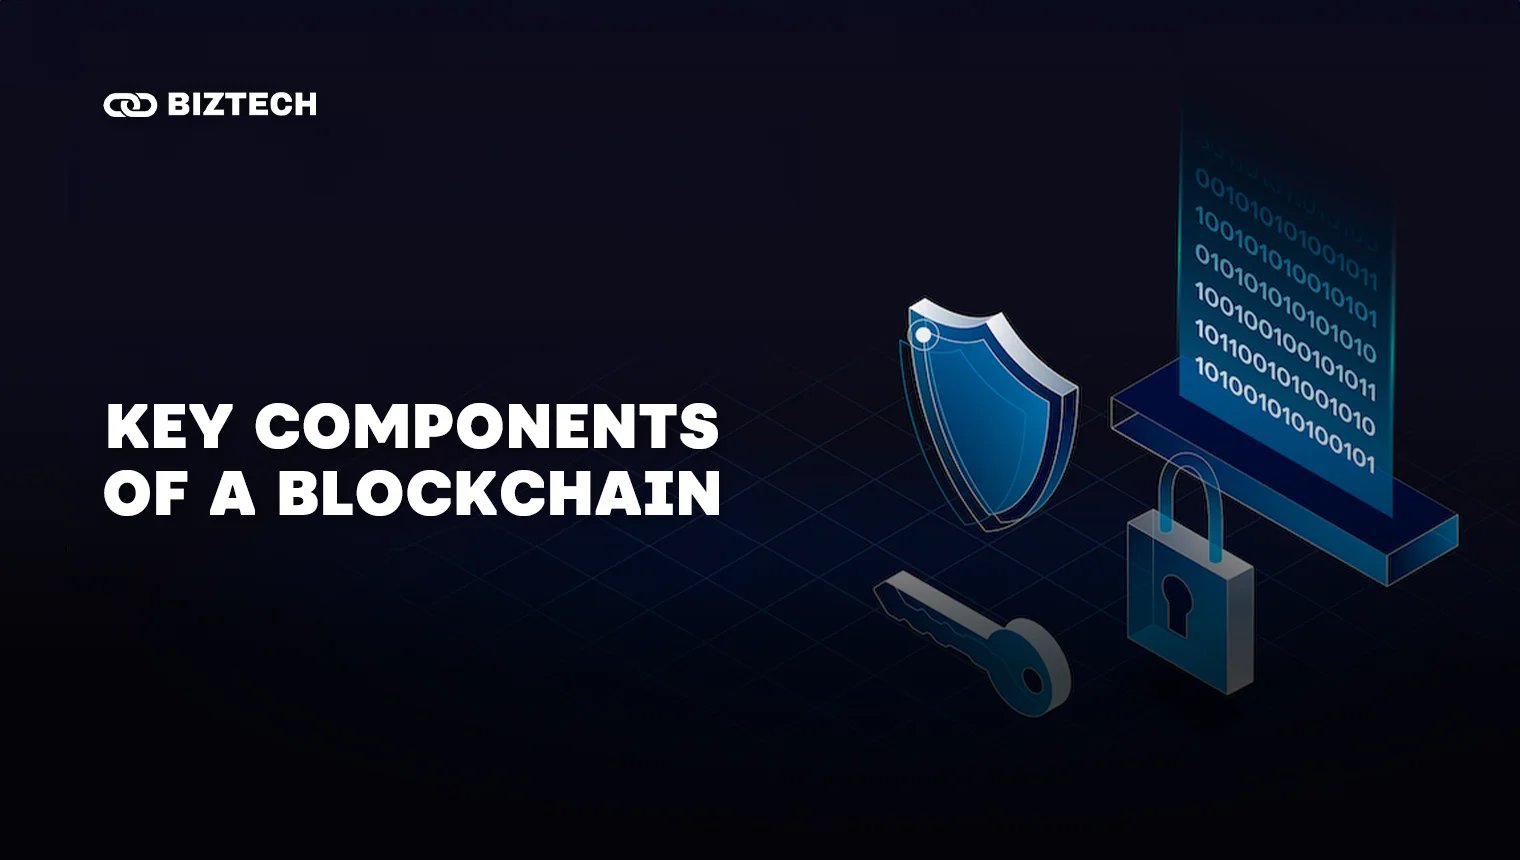
Blockchain technology is built on several key components that work together to create a secure, decentralized, and immutable ledger. Here are the main key components:
1. Blocks
Blocks are the fundamental units of a blockchain. Each block contains a list of transactions, a timestamp, and a reference to the previous block (excluding the initial block).
These blocks are cryptographically linked together to form a continuous chain, which is the definition of a “blockchain.”
2. Transactions
Transactions represent the exchange of value or data among participants within the blockchain network. They can include tasks like transferring cryptocurrencies, executing smart contracts, storing data, or triggering specific actions within the blockchain ecosystem.
3. Cryptographic Hash Functions
Hash functions in cryptography are mathematical algorithms that take in input (or messages) and produce a fixed-size output (hash value) that is associated with the input data.
Hash functions play an important role in creating digital fingerprints of blocks in the context of blockchain. They ensure data integrity and uphold immutability.
4. Consensus Mechanism
Consensus mechanisms are protocols or algorithms that allow nodes in a decentralized network to agree on the current state of the blockchain.
Using these mechanisms, every node verifies and accepts the legitimacy of transactions and the sequence in which they are added to the blockchain.
PBFT (Practical Byzantine Fault Tolerance) and Proof of Stake (PoS) are notable examples.
5. Decentralized Network
A decentralized network represents a peer-to-peer architecture wherein nodes (computers or servers) collectively uphold the blockchain. This structure lacks a central authority or single point of control, making it resistant to restrictions and manipulations.
6. Digital Signature
Digital signatures involve cryptographic methods used to provide authentication, integrity, and confidentiality in blockchain transactions.
Each participant within the blockchain ecosystem possesses a unique private key used for signing transactions. These signatures can be verified through corresponding public keys. It ensures transaction authenticity and tamper resistance.
7. Smart Contracts
Smart contracts are contractual terms that are directly encoded as code, which are self-executing agreements.
When specific requirements are satisfied, these contracts automatically carry out and enforce predetermined norms and conditions.
Smart contracts run on blockchain platforms such as Ethereum and allow for automated, trustless transactions without intermediaries. They are the building blocks of everything from decentralized exchanges to NFT marketplaces.
How to Build Your Blockchain From Scratch Using Python
Now I will show you in simple steps how to build a blockchain from scratch using Python.
Step 1: Install Python and Required Libraries
To build your blockchain from scratch, you must first set up your Python development environment.
Make sure you have Python 3.11 or later installed (Python 3.14 is the current stable release as of 2026, and 3.7 reached end-of-life back in 2023, so avoid it). You can download Python directly from the official website.
Once Python is installed, use a virtual environment to manage dependencies:
python3  -m venv blockchain-env
source blockchain-env/bin/activate
Next, install Flask using pip:
pip install flask
- flask: Used to create a web server for interacting with the blockchain.
- hashlib: Provides cryptographic hashing functions. This is part of the Python standard library, so you do not need to (and cannot)
pip installit — the same goes forjsonandtime, which we also use below.
A quick reality check before you start: the Python build below is an excellent learning exercise that shows how blocks, hashing and proof of work fit together. It is not a production blockchain — it runs on a single machine with no peer-to-peer networking, no wallet key management and no real consensus across nodes. Treat it as a sandbox for understanding the mechanics, then move to a battle-tested platform (covered later) when you want something real users can touch.
Step 2: Define the Blockchain Class
In this step, you will create a Python class to represent the blockchain.
This class will contain the methods and attributes necessary for managing the blockchain’s functionality.
Create a new Python file (e.g., blockchain.py) and begin by defining the Blockchain class.
import hashlib
import json
from time import time

class Blockchain:
    def __init__(self):
        self.chain = []                                   # List to store the blocks
        self.current_transactions = []                    # List to hold new transactions
        self.new_block(previous_hash='1', proof=100)      # Create the genesis block

    def new_block(self, proof, previous_hash):

        # Creates a new block and adds it to the chain

        block = {
            'index': len(self.chain) + 1,
            'timestamp': time(),
            'transactions': self.current_transactions,
            'proof': proof,
            'previous_hash': previous_hash or self.hash(self.chain[-1])
        }

        # Reset the list of transactions and add the block to the chain

        self.current_transactions = []
        self.chain.append(block)
        return block

    def new_transaction(self, sender, recipient, amount):

        # Add a new transaction to the list of transactions

        self.current_transactions.append({
            'sender': sender,
            'recipient': recipient,
            'amount': amount,
        })

        # Return the index of the block that will hold the transaction

        return self.last_block()['index'] + 1

    def hash(self, block):

        # Create a SHA-256 hash of a block

        block_string = json.dumps(block, sort_keys=True).encode()
        return hashlib.sha256(block_string).hexdigest()

    def last_block(self):
        # Return the last block in the chain

        return self.chain[-1]
Here’s what the code does:
- __init__: Initializes the blockchain with an empty chain and a list of transactions. A genesis block is also created, serving as the chain’s initial block.
- new_block: Creates a new block using the provided evidence and previous hash. The new block contains current transactions and other metadata.
- new_transaction: Adds a new transaction to the list and returns the block index that will contain the transaction.
- hash: Takes a block as input and returns its SHA-256 hash.
- last_block: Returns the final block in the chain.
By defining the Blockchain class, you create the foundation of your blockchain. This class handles the creation of blocks and the management of transactions within the blockchain.
Step 3: Implement Proof of Work
In this step, you will add a Proof of Work algorithm to your blockchain. This algorithm ensures the integrity and security of the blockchain by requiring a certain amount of computational effort to create new blocks.
Add the following method to your Blockchain class:
def proof_of_work(self, last_block):

    # Implement the Proof of Work algorithm

    last_proof = last_block['proof']
    last_hash = self.hash(last_block)
    proof = 0

    # Search for a new proof that satisfies the proof condition

    while not self.valid_proof(last_proof, proof, last_hash):
        proof += 1

    return proof

def valid_proof(self, last_proof, proof, last_hash):

    # Validate the proof: Does the hash contain the required number of leading zeros?

    guess = f'{last_proof}{proof}{last_hash}'.encode()
    guess_hash = hashlib.sha256(guess).hexdigest()

    # Define the difficulty of your blockchain (number of leading zeros)

    difficulty = 4
    return guess_hash[:difficulty] == '0' * difficulty
Here’s what the code does:
- proof_of_work: Takes the last block as input and finds a new proof of work. It starts with a proof value of 0 and increments it until the proof satisfies the condition specified in the valid_proof method.
- valid_proof: Takes the last proof, current proof, and the hash of the last block as inputs. It hashes the combination and determines if the resultant hash contains a certain amount of leading zeros. The number of leading zeros defines the difficulty of your blockchain’s Proof of Work.
By implementing the Proof of Work algorithm, you create a secure and tamper-resistant blockchain. Adjust the difficulty as needed to control how challenging it is to find valid proof.
Step 4: Create a Flask Web Server for Interactions
In this step, you will create a Flask web server to interact with your blockchain.
This server will handle incoming HTTP requests for new transactions and blocks, as well as provide information about the blockchain.
Start by importing the required libraries into a new Python file for your web server (server.py, for example).
from flask import Flask, jsonify, request
from blockchain import Blockchain

# Create a new Flask app and Blockchain instance

app = Flask(__name__)
blockchain = Blockchain()
Next, add the following endpoints to your server:
/mine: This endpoint mines a new block by running the Proof of Work algorithm, adds the block to the blockchain, and returns the new block.
@app.route('/mine', methods=['GET'])
def mine():
    last_block = blockchain.last_block()
    proof = blockchain.proof_of_work(last_block)

    # Reward the miner (here, a fictitious "0" sender for simplicity)

    blockchain.new_transaction(sender="0", recipient="your_address", amount=1)

    previous_hash = blockchain.hash(last_block)
    block = blockchain.new_block(proof, previous_hash)

    response = {
        'message': 'New block mined',
        'index': block['index'],
        'transactions': block['transactions'],
        'proof': block['proof'],
        'previous_hash': block['previous_hash'],
        'timestamp': block['timestamp']
    }
    return jsonify(response), 200
/transactions/new: This endpoint allows you to create a new transaction.
@app.route('/transactions/new', methods=['POST'])
def new_transaction():
    values = request.get_json()

    # Check if the required fields are present
    required = ['sender', 'recipient', 'amount']
    if not all(k in values for k in required):
        return 'Missing fields', 400

    # Create a new transaction
    index = blockchain.new_transaction(values['sender'], values['recipient'], values['amount'])

    response = {'message': f'Transaction will be added to block {index}'}
    return jsonify(response), 201
/chain: This endpoint returns the full blockchain.
@app.route('/chain', methods=['GET'])
def full_chain():
    response = {
        'chain': blockchain.chain,
        'length': len(blockchain.chain)
    }
    return jsonify(response), 200
Finally, start the Flask server:
if __name__ == '__main__':
    app.run(host='0.0.0.0', port=5000)
This code snippet creates three routes:
- /mine: Triggers mining a new block, rewards the miner, and returns details of the new block.
- /transactions/new: Allows users to submit new transactions.
- /chain: Returns the current state of the blockchain.
By setting up a Flask web server, you enable interactions with your blockchain, allowing for mining, transaction submissions, and access to the chain’s data. This step completes the functionality needed for your basic blockchain implementation.
Step 5: Launch the Blockchain Web Server
In this step, you will start the Flask web server, which allows you to interact with your blockchain application through the web. Ensure your server script is ready to be run, then execute it.
To launch the server, enter the following command into your terminal:
python server.py
Make sure you are in the correct directory where your server script (server.py) is located. This command will start the Flask web server on the specified host (0.0.0.0) and port (5000). Once the server is running, you will be able to interact with the blockchain using your web browser, or other tools such as curl or Postman.
Here are some examples of how you can interact with your blockchain server:
- Mine a new block:
- Open a web browser and go to http://localhost:5000/mine
- This endpoint will mine a new block, reward the miner, and return the details of the new block.
- Create a new transaction:
- Use a tool like curl or Postman to send a POST request with a JSON payload to http://localhost:5000/transactions/new.
- Example JSON payload
{
    "sender": "Alice",
    "recipient": "Bob",
    "amount": 5
}
- This request will create a new transaction in the blockchain and return a message indicating the index of the block that will hold the transaction.
- View the blockchain:
- Open a web browser and navigate to http://localhost:5000/chain
- This endpoint returns the full blockchain as a JSON object.
By launching the web server, you enable interactions with your blockchain through a simple web interface.
This setup allows you to easily test and use your blockchain implementation for various applications such as cryptocurrency projects or distributed ledgers.
How to Build a Blockchain with Development Platforms
The five platforms below cover the vast majority of real projects. Public chains (Ethereum, Solana, Polygon) are open to anyone; permissioned frameworks (Hyperledger Fabric, Corda) are for known participants inside a business or consortium.
| Platform | Type | Main language | Consensus | Best for |
|---|---|---|---|---|
| Ethereum | Public | Solidity | Proof of Stake | DApps, DeFi, NFTs, tokens — the default choice |
| Solana | Public | Rust (Anchor) | PoS + Proof of History | High-speed, low-fee consumer apps & payments |
| Polygon | Public (EVM L2) | Solidity | Proof of Stake | Ethereum-compatible apps that need low fees |
| Hyperledger Fabric | Permissioned | Go, Java, JavaScript | BFT (SmartBFT, v3.0) | Private enterprise & supply-chain networks |
| Corda (R3) | Permissioned | Kotlin, Java | Notary model | Regulated finance, banking & trade finance |
Step 1: Selecting a suitable blockchain platform
Ethereum:
Ethereum is the most widely used smart-contract platform and the home of decentralized apps (DApps) written in Solidity. Crucially, Ethereum no longer uses Proof of Work — it switched to Proof of Stake in “The Merge” on 15 September 2022, cutting its energy use by roughly 99.9%. That is one of the most common facts older tutorials still get wrong, so double-check the date on any guide you follow.
Ethereum has the largest developer community, the deepest tooling and the most learning resources, which makes it the default starting point for most people. The trade-off is cost: complex transactions on Ethereum’s main network (Layer 1) can get expensive during busy periods, which is why many teams deploy to a cheaper Layer 2 such as Polygon, Arbitrum or Base while keeping full Ethereum compatibility.
Solana:
Solana is a high-throughput public blockchain built for speed and very low fees. Its programs (smart contracts) are usually written in Rust using the Anchor framework — Rust is used by roughly 90% of Solana projects. The learning curve is steeper than Solidity, but Anchor makes it far more approachable, and Solana is a strong choice for consumer apps, payments and high-volume NFT or gaming projects. New to it? See our Solana vs Bitcoin comparison.
Hyperledger Fabric:
Hyperledger Fabric (now hosted by LF Decentralized Trust) is the most widely deployed permissioned, enterprise blockchain framework. It lets organisations build private networks with fine-grained access control and privacy. Fabric 3.0, released in September 2024, added a Byzantine Fault Tolerant (BFT) ordering service via the SmartBFT protocol for stronger decentralisation.
It is well suited to supply chain, healthcare and finance consortia where the participants are known and data must stay confidential.
Corda:
Corda is an open-source platform from R3 built for regulated financial institutions. It uses a unique “notary” model rather than broadcasting every transaction to the whole network, which suits privacy-sensitive use cases in banking, insurance and trade finance. By 2025 R3 reported 20+ regulated networks live in production with more than US$17 billion in tokenised real-world assets, and announced an integration bridging Corda with the public Solana network — a sign of how enterprise and public chains are converging.
Polygon: If you like Ethereum’s tooling but need lower fees, Polygon is an EVM-compatible network where the same Solidity contracts and tools (below) work almost unchanged — a popular middle ground for startups and NFT projects.
Step 2: Understanding Platform Features
Familiarize yourself with the selected platform’s features and capabilities, including its consensus mechanism, smart contract functionality, programming languages supported, and scalability options.
Step 3: Setting Up Development Environment
Install the tools, libraries and SDKs your chosen platform needs. For Ethereum and EVM chains in 2026 the standard toolkit is Hardhat or Foundry for compiling, testing and deploying; Remix (a browser IDE) for quick experiments; and OpenZeppelin’s audited contract libraries so you are not writing security-critical code such as tokens from scratch. For Solana you would install the Solana CLI and the Anchor framework. Avoid tutorials built around Truffle or Ganache — those tools are no longer maintained.
Step 4: Designing Smart Contracts
Define the smart contracts your application needs. Smart contracts are self-executing programs whose terms are written directly in code. On Ethereum you write them in Solidity (use a current 0.8.x compiler, which has built-in overflow protection) and lean on OpenZeppelin’s audited templates for standards such as ERC-20 tokens and ERC-721 NFTs. On Solana you write programs in Rust with Anchor. Keep contracts small and simple — every line you deploy is code you can never quietly patch once it is live.
Step 5: Testing Smart Contracts
Thoroughly test your smart contracts to verify they work as intended and are free of errors or vulnerabilities. Note that Truffle and Ganache were sunset by Consensys (announced September 2023 and wound down through 2024), so newer guides use Hardhat or Foundry for Ethereum testing instead. On Hyperledger Fabric your smart-contract code is called “chaincode,” and you test it with Fabric’s own test network and language-specific test tools.
Step 6: Deploying Smart Contracts
Deploy smart contracts to the blockchain network using the platform’s deployment tools or APIs. This process involves submitting the contract code and deploying it to the network, where it becomes immutable and accessible to users.
Step 7: Interfacing with the Blockchain
Develop front-end applications or interfaces to interact with the blockchain network and smart contracts. For Ethereum, use a modern JavaScript library such as ethers.js or viem to send transactions and read data. (The older Web3.js library was sunset and archived in March 2025, so avoid starting new projects with it.) On Solana you would use @solana/web3.js with Anchor’s generated client, and enterprise platforms ship their own SDKs.
Step 8: Testing and Deployment
Thoroughly test your blockchain application to guarantee its functionality, security, and performance.
Run both unit and integration tests to ensure that all components function together flawlessly. After testing is completed, deploy your application to the specified network, whether it is a testnet or the mainnet.
Step 9: Monitoring and Maintenance
Monitor the performance and health of your blockchain application after deployment. Implement monitoring tools and processes to quickly discover and resolve any faults or abnormalities.
Additionally, regularly update and maintain your application to ensure its compatibility with platform updates and evolving requirements.
Match Your Goal to the Right Path
Still unsure? Use this quick decision guide to jump straight to the right tool for what you actually want to build.
| Your goal | Recommended path |
|---|---|
| Understand how blockchains really work | Build the Python demo in this guide |
| Launch a token, NFT or DApp without huge fees | Polygon (or an Ethereum L2) + Hardhat/Foundry + OpenZeppelin |
| Maximum security & ecosystem for a serious DApp | Ethereum mainnet + Hardhat/Foundry, test on Sepolia first |
| Very high volume, low-cost consumer app | Solana + Rust/Anchor |
| Private network between known companies | Hyperledger Fabric 3.0 |
| Regulated finance / tokenised assets | Corda (R3) — plus legal counsel |
Security Considerations
Security is critical in blockchain development, regardless of whether you build your blockchain from scratch with Python or use development platforms.
Cryptography plays an important role in ensuring the security of blockchain networks by enabling data encryption, authentication, and integrity verification.
In the context of blockchain security, cryptography serves as the backbone of various security measures, safeguarding sensitive data and preventing illegal activities.
Cryptography is integral to blockchain security due to its ability to secure transactions, data, and identities within the decentralized network.
Public and private key pairs are generated using encryption techniques such as asymmetric cryptography, allowing for secure communication and transaction signing.
With public keys serving as addresses and private keys as digital signatures, cryptography ensures that only authorized participants can access and interact with blockchain data, thereby mitigating the risk of unauthorized access and tampering.
Even with blockchain technology’s strong cryptographic foundations, security threats are still growing, so proactive mitigation techniques are needed. Common security threats for blockchain networks include:
- 51% Attacks: In Proof of Work (PoW) blockchains, a 51% attack occurs when a single entity or group gains control of the network’s hashing power, allowing them to manipulate transactions and disrupt network consensus. Mitigation strategies involve enhancing network decentralization and implementing consensus algorithm adjustments.
- Double Spending: Double spending entails the unauthorized duplication of digital assets, allowing a user to spend the same funds more than once. Blockchain networks employ consensus mechanisms and cryptographic techniques to prevent double spending, ensuring transaction validity and integrity.
- Smart Contract Vulnerabilities: Smart contracts are susceptible to vulnerabilities such as reentrancy attacks, where malicious actors exploit recursive calls to drain contract funds. Code audits, rigorous testing, and the use of secure development practices can mitigate smart contract vulnerabilities and enhance overall network security.
- Private Key Theft: Compromised keys grant unauthorized access to users’ digital assets. Secure key management — hardware (cold) wallets, multi-signature schemes and, for larger holdings, dedicated crypto custody — dramatically reduces this risk. Also beware modern “approval phishing,” where a user is tricked into signing a malicious transaction that drains their wallet.
Deployment and Testing
Deploying and testing your blockchain application are important steps in the development process, whether you choose to build your blockchain using Python or by development platforms.
Before deploying your blockchain application to the main network, it’s essential to test it on a dedicated test network.
Deploying to a test network allows you to identify and address potential issues and vulnerabilities before exposing your application to real users and valuable assets. The deployment process consists of the following steps:
Step 1: Choose a Test Network
Select a suitable test network so you can deploy with fake tokens before risking real money. Important: the old Ethereum testnets you will see in dated tutorials — Rinkeby, Ropsten, Kovan and Goerli — are all deprecated. As of 2026 the recommended Ethereum testnet for smart-contract and DApp development is Sepolia. If you are testing validator or staking setups instead, use Hoodi, which replaced Holesky in September 2025. Grab free test ETH from a public faucet, deploy there first, and only touch the main network once everything works.
Step 2: Configure Deployment Parameters
Configure deployment parameters, including network settings, gas fees, and contract addresses. Ensure that your application is compatible with the chosen test network and adheres to network-specific requirements.
Step 3: Deploy Smart Contracts
To get your smart contracts on the test network, use deployment tools or scripts. Verify that the deployment process completes successfully and that contract addresses are generated as expected.
Step 4: Test Transaction Functionality
Test transaction functionality by interacting with your smart contracts on the test network. Execute various transactions and verify that they behave as intended, updating blockchain state and triggering contract logic accordingly.
Step 5: Monitor Deployment Status
Monitor the deployment status and transaction confirmations on the test network. Ensure that all transactions are correctly handled and that smart contracts are deployed and available for testing.
Testing and debugging are essential phases of blockchain development, ensuring the reliability, functionality, and security of your application.
Comprehensive testing involves various techniques and methodologies to identify and address potential issues effectively:
- Unit Testing: Conduct unit tests to verify the functionality of individual components within your blockchain application, including smart contracts, transaction processing logic, and cryptographic functions. Unit testing helps detect bugs and inconsistencies early in the development process.
- Integration Testing: Perform integration tests to evaluate the interaction between different components and modules within your blockchain application. Integration testing ensures that components work together harmoniously and that data flows smoothly throughout the system.
- Functional Testing: Execute functional tests to validate the overall functionality and behaviour of your blockchain application. Functional testing involves simulating real-world scenarios and user interactions to assess application performance and responsiveness.
- Security Audits: Conduct security audits to detect and address bugs in your blockchain application. These audits involve code reviews, vulnerability assessments, and penetration testing to uncover weaknesses and strengthen your application’s security posture.
- Debugging and Optimization: Debug and optimize your blockchain application to improve performance, efficiency, and reliability. Address any identified issues, optimize code and algorithms, and refine application logic to enhance overall functionality and user experience.
Building a Blockchain Project in Malaysia & Singapore
Writing code and running a private test network is perfectly legal in both Malaysia and Singapore — the rules kick in the moment your project touches the public or handles other people’s money.
In Malaysia, digital tokens offered to the public and the platforms that trade them fall under the Securities Commission Malaysia (SC). A public token sale generally has to run through an SC-registered Initial Exchange Offering (IEO) operator, and any exchange listing tokens must be a registered Digital Asset Exchange (DAX). As of mid-2026 the SC’s list of registered DAX operators includes Luno, HATA, MX Global, SINEGY and Kinetic DAX, and a revised regulatory framework took effect on 20 May 2026. Bank Negara Malaysia has also made clear that crypto is not legal tender.
In Singapore, the Monetary Authority of Singapore (MAS) licenses digital-token service providers under the Payment Services Act and the newer Digital Token Service Provider (DTSP) rules. If you plan to issue a token, offer custody or run an exchange for Singapore users, you will most likely need a licence.
The practical takeaway: build and experiment freely, but get proper legal advice before you raise money or open your network to the public. If you just want to buy a little crypto to fund a testnet wallet, use an SC-registered exchange in Malaysia or a MAS-licensed provider in Singapore. For a plain-English primer, see our guide to cryptocurrency in Malaysia.
Conclusion
In conclusion, whether you go with Python or blockchain platforms, both approaches offer unique advantages and challenges. Python provides flexibility and customization, while blockchain platforms offer convenience and built-in features.
Ultimately, the decision depends on your project requirements, technical expertise, and development goals.
With careful thought and by following the steps we discussed, you can start your blockchain journey with confidence and create cool solutions that use blockchain’s power.
Tools, versions and testnets in this guide were verified in August 2026. Blockchain tooling changes fast — always confirm against the official documentation (linked below) before you build.
Helpful official resources
- Ethereum.org developer portal — official docs, tutorials and testnet guides.
- Hardhat — the current standard for compiling, testing and deploying EVM contracts.
- Solidity documentation — the reference for Ethereum’s smart-contract language.
Disclaimer: This guide is published by KayaToday for educational purposes only and is not financial, legal or investment advice. Building, launching or funding a blockchain, token or DApp can carry legal, tax and regulatory obligations that vary by country. Always do your own research and consult a qualified professional before deploying to a live network or raising funds.